Chapter 13: Documentation
In this chapter, you’ll learn about the tools you can use to document your Pylons applications. Documentation can take a number of forms:
- Source code documentation (comments and docstrings)
- API documentation
- User guides
- Developer guides
The combination of approaches you choose to use for your project will depend on who will be using it and in what manner. For example, if you are developing an application on your own for your home page, you might decide that source code documentation is sufficient. If you are writing a library to support a Pylons application and you hope other developers will use it, then API documentation will be important. If you are creating an application like the SimpleSite tutorial application that might eventually be distributed on the Internet, then a user guide explaining how to install the application and what functionality it contains will be important. Finally, if you are developing a Pylons application or library that you hope other developers will contribute to or if you are working in a larger team, you will need developer guides that explain the structure of the code, the conventions being used, and any particular code styles that the application uses.
The tools you’ll learn about in this chapter will help you with each of these types of documentation.
Python’s Documentation Tools
The Python language has very good support for source code documentation. In the following sections, I’ll cover some of the language features that facilitate writing documentation as well as some of the tools available in the Python standard library for extracting documentation from Python source code.
Comments
Source code comments are a great way to leave information about your programs that will be read at a later time by people (possibly yourself) who need to know what you were thinking at the time you wrote them. They should be used anywhere you are doing something nonstandard or anywhere you think someone coming fresh to the code might misunderstand your intentions.
Luckily, Python code is generally fairly easy to read and understand, so a lot of the time you won’t need to write detailed comments about the code itself because it should be self-illuminating. Comments like the following one, for example, add no value and are best avoided:
# set i to 1
i = 1
As you’ll see next, a feature of Python known as a docstring is ideal for more detailed source code descriptions.
Docstrings
Python treats certain strings as documentation. If a bare string appears immediately at the beginning of a module, class, method, or function definition, with nothing but whitespace or comments before it, it will be considered the object’s docstring.
Here are some examples of docstrings:
>>> def test():
...     "This is a test function"
...
>>> class Test:
...             """
...     This is a test class
...     """
...     def test(self):
...             '''
...         This is a test method
...         which is defined on more than one line.
...         '''
...
>>>
Internally, Python assigns each docstring to a variable named __doc__ attached to the object being documented, and in fact you can access this directly:
>>> print test.__doc__
This is a test function
>>> print Test.__doc__

    This is a test class

>>> print Test().__doc__

    This is a test class

>>> print Test.test.__doc__

        This is a test method
        which is defined on more than one line

>>>
Docstrings enable you to write detailed documentation describing the object they represent. That documentation can then be read by anyone looking at the source code to understand what the code does. In addition, thanks to Python’s introspection abilities and various tools that can extract the docstring itself, detailed documentation can be produced in a variety of formats. You’ll learn about some of these tools in this chapter, starting with the built-in help() function.
The Built-In help() Function
The Python language has built-in support for help messages via the help() function. The best way to see how it works is to load an interactive Python prompt and test it. Let’s try to get help on the integer 1:
>>> help(1)
Help on int object:

class int(object)
 |  int(x[, base]) -> integer
 |
 |  Convert a string or number to an integer, if possible.  A floating point
 |  argument will be truncated towards zero (this does not include a string
 |  representation of a floating point number!)  When converting a string, use
 |  the optional base.  It is an error to supply a base when converting a
 |  non-string. If the argument is outside the integer range a long object
 |  will be returned instead.
 |
 |  Methods defined here:
 |
 |  __abs__(...)
 |      x.__abs__() <==> abs(x)
 |
 |  __add__(...)
 |      x.__add__(y) <==> x+y
 |
 |  __and__(...)
 |      x.__and__(y) <==> x&y
 |
As you can see, detailed help on the behavior of Python integers is returned (I’ve shown only the first few lines for brevity).
The information help() displays comes from a combination of introspection of the object passed to it and any docstrings associated with the object itself or any related objects. For help() to work effectively, you need to write good docstrings.
The help() function will reformat docstrings to remove whitespace and allow them to be better displayed on the command line. If you look at the example in the previous section, you’ll notice that the whitespace in the string was maintained in each of the .__doc__ variables themselves, but as you’ll see from the following example, unnecessary whitespace is removed by help():
>>> help(Test.test)
Help on method test in module __main__:

test(self) unbound __main__.Test method
    This is a test method
    which is defined on more than one line
This allows you to write multiline docstrings with the same indentation as the module, class, function, or method that they describe, which helps keep your source code neater.
Note
Many tools that operate on docstrings will treat the first line of a multiline string as having special significance. For example, nose, which you learned about in the previous chapter, will add the first line of the docstring on a test method to the error output if that test fails. You should therefore make sure the first line contains an appropriate summary if you are using a multiline docstring.
The whole Python standard library makes extensive use of docstrings as does Pylons. In fact, all the API documentation for Pylons is currently generated directly from docstrings using a tool called Sphinx, which you’ll learn about later in the chapter. Here is an example of the first few lines of output you’ll see if you use the help() function on the pylons module:
>>> import pylons
>>> help(pylons)
Help on package pylons:

NAME
    pylons - Base objects to be exported for use in Controllers

FILE
    /Users/james/pylons-dev/pylons/__init__.py

PACKAGE CONTENTS
    commands
    config
    configuration
    controllers (package)
    database
    decorator
    decorators (package)
    error
    helpers
    i18n (package)
    legacy
    log
    middleware
    templates (package)
    templating
    test
    testutil
    util
    wsgiapp
Documentation generated by help() is very useful at the Python console but less useful if you are coding an application. Luckily, the same docstrings can also be used to generate browseable documentation in HTML.
Doctests
From the previous chapter you’ll recall that one method for testing code was to use Python’s doctest module, which runs the Python code specified in the documentation to check that it works correctly. A doctest is simply a piece of sample code within a docstring but written as if it were typed at a Python interactive prompt.
Chapter 5 contained a simple emphasize() function in one of the examples that simply wrapped some HTML in <em> and </em> tags, escaping the HTML if it isn’t a literal. Let’s add a docstring to the function and add a doctest to the docstring. Save this as emphasize_helper.py:
from webhelpers.html import literal, HTML
def emphasize(value):
"""\
Emphasize some text by wrapping it in <em> and </em> tags
Any value passed to this function is HTML escaped if it is not
an instance of a webhelpers.html literal().
Here is an example that demonstrates how the helper works:
>>> emphasize('Greetings')
literal(u'<em>Greetings</em>')
>>> print emphasize('<strong>Greetings</strong>')
<em><strong>Greetings</strong></em>
"""
return HTML.em(value)
I think you’ll agree this is a lot of documentation for such a simple function, but it illustrates the point. The idea is that if you were to start a Python interactive prompt and import everything contained in the file and then if you copied the lines starting with >>> into the interactive prompt, the lines following them would be exactly what was produced. The doctest module can perform this check automatically.
The following Python script could then be used to extract the docstring and run the test. Save it as run_doctest.py:
import emphasize_helper
import doctest
doctest.testmod(emphasize_helper)
Run the test like this:
$ python run_doctest.py
If the test passes, no output will be generated. Now try introducing an error, perhaps by removing the final </em> tag from the second example. If you run the test again, you’ll get the following output:
**********************************************************************
File "/Users/james/emphasize_helper.py", line 13, in emphasize_helper.emphasize
Failed example:
print emphasize('<strong>Greetings</strong>')
Expected:
<em><strong>Greetings</strong>
Got:
<em><strong>Greetings</strong></em>
**********************************************************************
1 items had failures:
1 of 2 in emphasize_helper.emphasize
***Test Failed*** 1 failures.
Docstrings aren’t the only place you might want to write Python interactive prompt examples. You might also write them in standard documentation. The doctest module can also be used to extract doctests from ordinary text files like this:
import doctest
doctest.testfile('docs.txt')
Now that you’ve seen how to use doctests, you might consider incorporating them into the tests you learned about in the previous chapter. Generally speaking, doctests are more appropriate for testing functions and methods without a large number of dependencies. This makes them great for testing helpers but less suited to testing Pylons controller actions where you would also have to find some way of setting up the Pylons globals as part of the test.
For more information on doctests, take a look at the doctest module documentation at http://docs.python.org/library/doctest.html#module-doctest.
Introducing reStructuredText
Now that you’ve learned about doctests, let’s return to the business of writing documentation. As you’ll recall, tools like the help() function can introspect objects and extract docstrings, but one problem with this approach is that it doesn’t allow for any formatting. For example, you can’t mark code blocks or make certain words bold or italic. To solve this problem, a language called reStructuredText has become standard in the Python and Pylons communities, and it can be used within docstrings too.
reStructuredText is a lightweight markup language intended to be highly readable in source format and yet is full featured enough to produce sophisticated documentation. Here’s a sample reStructuredText document; save this as test.txt, and you’ll use it as an example for generating the various output types reStructuredText can be converted to:
Hello World
+++++++++++

This is a sample paragraph followed by a bulleted list:

* Item 1
* Item 2
* Item 3
reStructuredText documents tend to have file extensions of .rst or .txt. When you are packaging a Pylons project into egg format, setuptools will check for the presence of a README.txt file, so for the purposes of documenting a Pylons project, it is usually best to use a .txt extension if you want to use reStructruedText in any of the standard files that make up a Pylons project.
The tools to work with reStructuredText are found in a package called docutils. You can install docutils with Easy Install:
$ easy_install "docutils==0.5"
To create documentation using reStructuredText, you can use one of the conversion tools that comes with the docutils package. These tools are named as follows:
rst2html.py       rst2newlatex.py   rst2s5.py
rst2latex.py      rst2pseudoxml.py  rst2xml.py
As a Pylons developer, most of the time you’ll be interested in HTML output, which can be generated like this:
$ ./rst2html.py test.txt > test.html
Here’s what the test.html file contains:
<?xml version="1.0" encoding="utf-8" ?>
<!DOCTYPE html PUBLIC "-//W3C//DTD XHTML 1.0 Transitional//EN" "http://www.w3.org/TR/xhtml1/DTD/xhtml1-transitional.dtd">
<html xmlns="http://www.w3.org/1999/xhtml" xml:lang="en" lang="en">
<head>
<meta http-equiv="Content-Type" content="text/html; charset=utf-8" />
<meta name="generator" content="Docutils 0.5: http://docutils.sourceforge.net/" />
<title>Hello World</title>
<style type="text/css">
   ... styles excluded for brevity
</style>
</head>
<body>
<div class="document" id="hello-world">
<h1 class="title">Hello World</h1>

<p>This is a sample paragraph followed by a bulleted list:</p>
<ul class="simple">
<li>Item 1</li>
<li>Item 2</li>
<li>Item 3</li>
</ul>
</div>
</body>
</html>
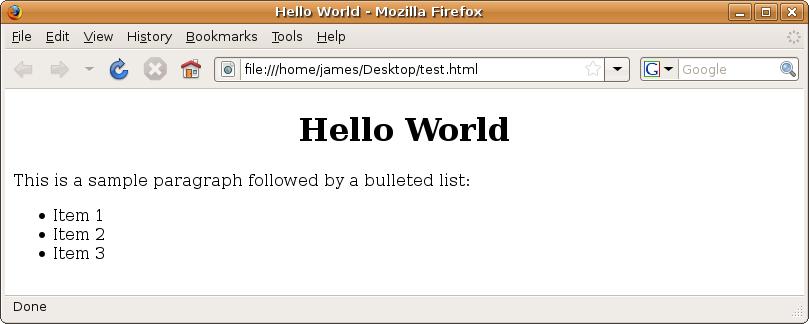
Figure 13-1 shows what the HTML looks like in a browser.
Although this might look plain, you are free to apply your own style sheet to the output produced, and because the HTML is well constructed, you can do a lot with the generated output.
Tip
You might be interested to know that this book is written entirely in reStructuredText and that many of the articles on the Pylons wiki are written in reStructuredText as well.
You can also generate HTML output from reStructuredText source programmatically. The following demonstrates this:
from docutils import core
from docutils.writers.html4css1 import Writer

def rstify(string):
    w = Writer()
    result = core.publish_parts(string, writer=w)['html_body']
    # Strip the first and last lines
    result = '\n'.join(result.split('\n')[1:-2])
    return result
To generate HTML from a string containing reStructuredText, you use the docutils.core.publish_parts() function. This returns a dictionary containing different parts of the HTML document. In most cases where you are generating HTML programmatically, it is likely you’ll want only the html_body part because you will make up the rest of the HTML yourself. The previous rstify() function does just that. The docutils package is actually very modular, and with a little effort you can create some very powerful customizations.
Rather than trying to explain the reStructuredText syntax in the book, I’ll refer you to some excellent resources online that will teach you everything you need to know:
- reStructuredText primer
- This is an excellent introduction to reStructuredText. It forms part of the Sphinx documentation; you can find it at http://sphinx.pocoo.org/rest.html.
- reStructuredText home page
- You can find the authoritative reStructruredText documentation at http://docutils.sourceforge.net/rst.html. Of particular value is the Quick reStructuredText guide at http://docutils.sourceforge.net/docs/user/rst/quickref.html.
Introducing Sphinx
Although using reStructedText as a stand-alone documentation tool is very useful, reStructuredText can also be used within docstrings to document individual functions, classes, and methods.
This functionality brings with it certain possibilities. Wouldn’t it be handy, for example, if there were a tool for extracting module documentation but that also understood reStructuredText for formatting that documentation? Well, there is just such a tool; I’ve mentioned it a number of times already, and it is called Sphinx.
Sphinx is a tool that translates a set of reStructuredText source files into various output formats including HTML and LaTeX (which can then be used to produce a PDF), automatically producing cross-references and indexes. The focus of Sphinx is handwritten documentation, but as you’ll see shortly, Sphinx can also be used to automatically generate documentation from source code.
You can install Sphinx with Easy Install like this (it requires Python 2.4 or newer to run):
$ easy_install "Sphinx==0.4.2"
Sphinx uses Jinja for its templating support, so Easy Install will install Jinja too if you didn’t install it in Chapter 5. Jinja currently expects a compiler to be present if you install it from source, so Mac OS X users will need to have Xcode installed (it includes GCC) or use a binary version.
Using Sphinx
Let’s use Sphinx to document the SimpleSite project. You’ll notice that the source directory already contains a docs directory. This is a great place to set up Sphinx. It already contains an index.txt file, but you’ll replace this with one generated by Sphinx, so delete it because it currently contains instructions about how to generate documentation with a tool called Pudge, which Sphinx supercedes.
Create a new Sphinx build like this, and answer the questions:
$ cd SimpleSite/docs
$ rm index.txt
$ sphinx-quickstart
Enter SimpleSite as the project name, and choose 0.1.0 as the version number. Use .txt as the file extension. Accept the defaults for everything else except autodoc. You do want to use Sphinx’s autodoc extensions, which will pick up documentation from docstrings in your Pylons project’s source code, so enter y to that question.
The docs directory will contain these files once the utility has finished:
- Makefile
- Generated on non-Windows platforms if you answered y to the makefile question at the end of the wizard. I won’t describe it here because all the functionality it contains can be reached via the command line directly.
- conf.py
- Contains all the Sphinx configuration for your project. There are quite a few options, but they are well commented in the conf.py file and documented on the Sphinx web site at http://sphinx.pocoo.org.
- index.txt
- This file represents your entire documentation for the project.
Here’s index.txt:
.. SimpleSite Documentation documentation master file, created by sphinx-quickstart on Thu Oct  2 14:16:47 2008.
   You can adapt this file completely to your liking, but it should at least
   contain the root `toctree` directive.

Welcome to SimpleSite Documentation's documentation!
====================================================

Contents:

.. toctree::
   :maxdepth: 2

Indices and tables
==================

* :ref:`genindex`
* :ref:`modindex`
* :ref:`search`
Now that Sphinx is configured, let’s build the documentation. The sphinx-build command takes the source directory and output directory commands. In this case, the source directory is the current directory (docs), and the output directory is a new subdirectory called .build. The -b html option tells Sphinx you want HTML output (the default). Run the command like this:
$ sphinx-build -b html . ./.build
Sphinx v0.4.2, building html
trying to load pickled env... not found
building [html]: targets for 1 source files that are out of date
updating environment: 1 added, 0 changed, 0 removed
reading... index
pickling the env... done
checking consistency...
writing output... index
finishing...
writing additional files... genindex modindex search
copying static files...
dumping search index...
build succeeded.
After the build has succeeded, the subdirectories .build, .static, and .templates will be present in the docs directory.
Note
Unix and Mac OS X users should note that folders beginning with . are often hidden in the file browser software, so you may not see these directories unless you use the command line.
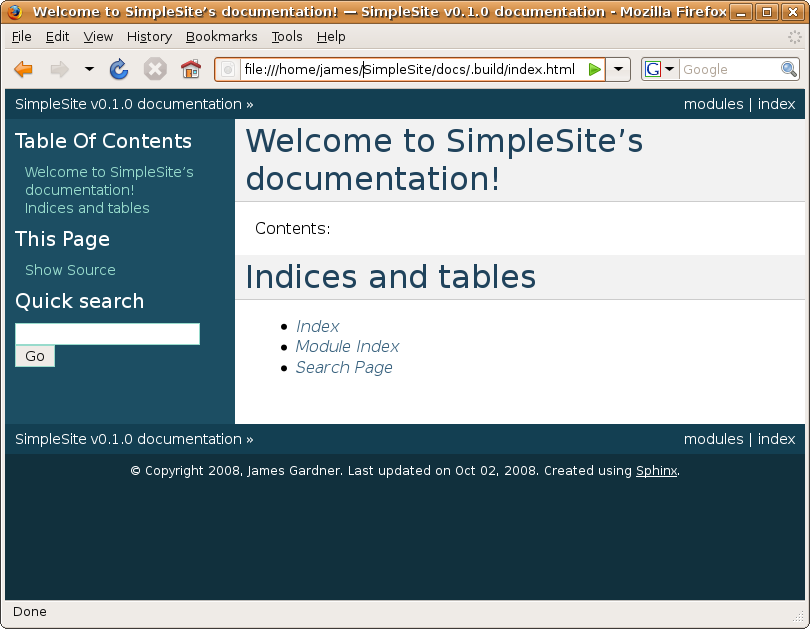
The .build directory contains the HTML output. Open the index.html file in a web browser; Figure 13-2 shows what you’ll see.
You can easily customize the look and feel of the generated documents using templates. See the Sphinx documentation for the details.
Now let’s add two files to the docs directory. These will form the basis for our user and developer documentation, respectively. Add user_guide.txt with this content:
User Guide
==========

This will contain instructions for end users of the application.
Add developer_guide.txt with this content:
Developer Guide
===============

This software is documented in detail in the SimpleSite tutorial
chapters of the book *The Definitive Guide to Pylons* available
under an open source license at http://pylonsbook.com. You should
read those chapters to discover how SimpleSite is developed.
The reStructuredText format doesn’t have any option for linking documents, so Sphinx provides its own called toctree. The toctree directive should have a list of all the documents you want included in the documentation. Update the toctree directive in the index.txt file to look like this (notice that the file names shouldn’t contain the .txt extensions and that there is a blank line before the document list):
.. toctree::
   :maxdepth: 2

   user_guide
   developer_guide
When choosing names for your documents, you should avoid using genindex, modindex, and search and instead choose names that don’t start with an _ character.
Now rebuild the documentation by running the sphinx-build command again:
$ sphinx-build -b html . ./.build
If you add a file to the directory structure but forget to include it in the toctree, Sphinx will show you a warning like this when you try to build the documentation:
checking consistency...
WARNING: /Users/james/SimpleSite/docs/developer_guide.txt:: document isn't included in any toctree
Once the build completes successfully, you will see that the new index.html file has two links in the Contents section. Sphinx automatically uses the titles from the documents themselves rather than using their file names. If you click the links, you will see the guides have been correctly generated. What is more, you’ll also find the search box to the left side also works. Sphinx compiles a search index in .build/searchindex.json as part of the build process, and it uses this to search your documentation.
Documenting Python Source Code
Although being able to write paragraphs of text is very useful a lot of the time, you will want to be able to document Python source code directly. To facilitate this, Sphinx adds a number of markup constructs to the standard ones supported by reStructuredText.
Let’s add a new file called api.txt to contain some API documentation. You’ll also need to add it to the toctree directive in index.txt.
Let’s start by adding a title and a brief summary to the file:
API Documentation
=================

This page contains some basic documentation for the SimpleSite project. To
understand the project completely please refer to the documentation on the
Pylons Book website at http://pylonsbook.com or read the source code directly.
Now let’s add some information about the simplesite and simplesite.controllers modules. To do this, you might write the following:
The :mod:`simplesite` Module
----------------------------

.. module:: simplesite

Contains all the controllers, model and templates as sub-modules.

The :mod:`controllers` Module
-----------------------------

.. module:: simplesite.controllers

Contains all the controllers. The most important of which is
:class:`PageController`.
Let’s also document the page controller since so far it contains the majority of the application’s logic. You might add this:
.. class:: PageController

The :class:`PageController` is responsible for displaying pages as well as
allowing users to add, edit, delete and list pages.

.. method:: PageController.view(self[, id=None])

When a user visits a URL such as ``/view/page/1`` the :class:`PageController`
class's :meth:`view` action is called to render the page.
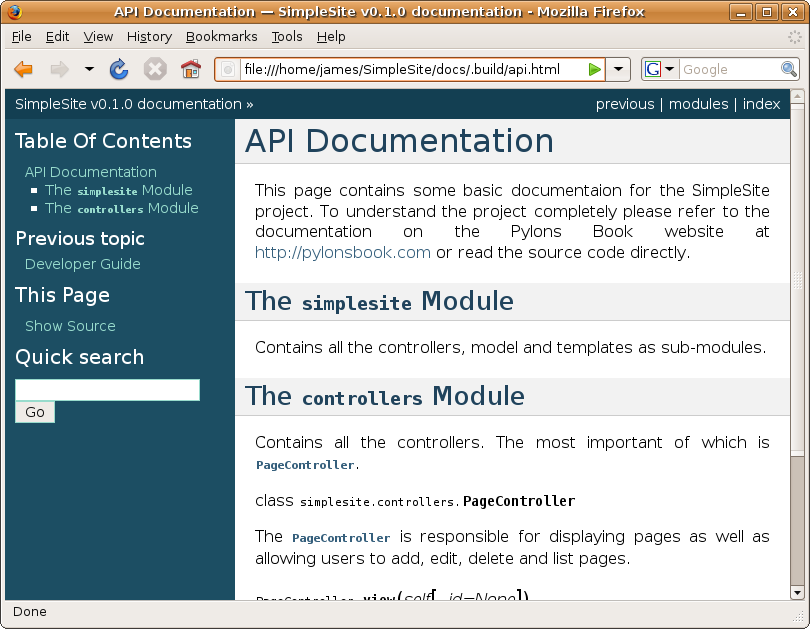
If you rebuild the documentation this time, the API documentation page will look like Figure 13-3.
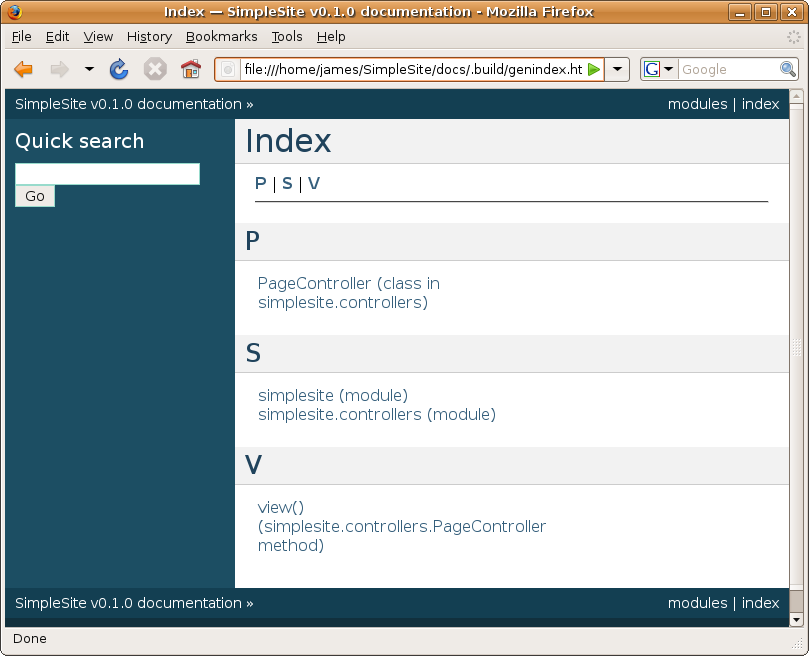
More interestingly, Sphinx has understood that the page documents the simplesite and simplesite.controllers modules, and it has recognized that PageController is in the simplesite.controllers module. With this knowledge, it has been able to produce both a Global Module Index and a general Index page. Figure 13-4 shows the Index page.
Tip
All the current Python documentation is written in reStructuredText and generated in this manner by Sphinx. You can see it online at http://docs.python.org.
Automatically Generating Documentation
If you have a lot of modules, classes, methods, and functions to document, it can become very tedious to document them all manually, particularly if you also duplicate much of the documentation in the docstrings themselves. Sphinx provides the sphinx.ext.autodoc extensions for this purpose. The autodoc extension automatically extracts docstrings from the objects you tell it about and includes them as part of your Sphinx documentation.
Let’s use it to extract the docstring from the SimpleSite lib/helpers.py module. Add the following to the end of api.txt:
The :mod:`helpers` Module
-------------------------

.. automodule:: simplesite.lib.helpers
For autodoc to work, it must be able to import the simplesite.lib.helpers module. This means the SimpleSite application must be installed in the same virtual Python environment you are running Sphinx with. Run this command to install it in develop mode so that any changes you make are immediately available to Sphinx:
$ python setup.py develop
Now you can build the documentation again:
$ sphinx-build -b html . ./.build
You’ll see that autodoc has found the correct docstring and used it to generate the necessary documentation. In addition to the .. automodule:: construct, there are others to handle classes, functions, and methods. There is also a range of options for each of the constructs. One of the more useful options for ..automodule:: is :members: which can be used to automatically document each of the objects which are directly contained in a module but not imported classes or functions.
.. automodule::
   :members:
You can also specify just the members you want to document.
.. automodule::
   :members: foo, Bar
Syntax Highlighting
Sometimes it is useful to show code examples. In reStructuredText, you would normally just use an empty :: directive to tell reStructuredText to display the following text verbatim, but Sphinx allows you to be slightly more sophisticated. If you install a package called Pygments, Sphinx will be able to automatically highlight source code.
It is usually installed along with Sphinx, but you can also install Pygments directly like this:
$ easy_install "Pygments==0.11.1"
You then mark blocks of code in your source by using a .. code-block:: directive. The Pygments short name for the type of code the block represents should be added immediately after the :: characters and the code itself in an indented block after that. Pygments can highlight many different types of code including HTML, Mako templates, a Python interactive console, and more. A full list of the different lexers for source code highlighting, as well as their corresponding short names, is available at http://pygments.org/docs/lexers/.
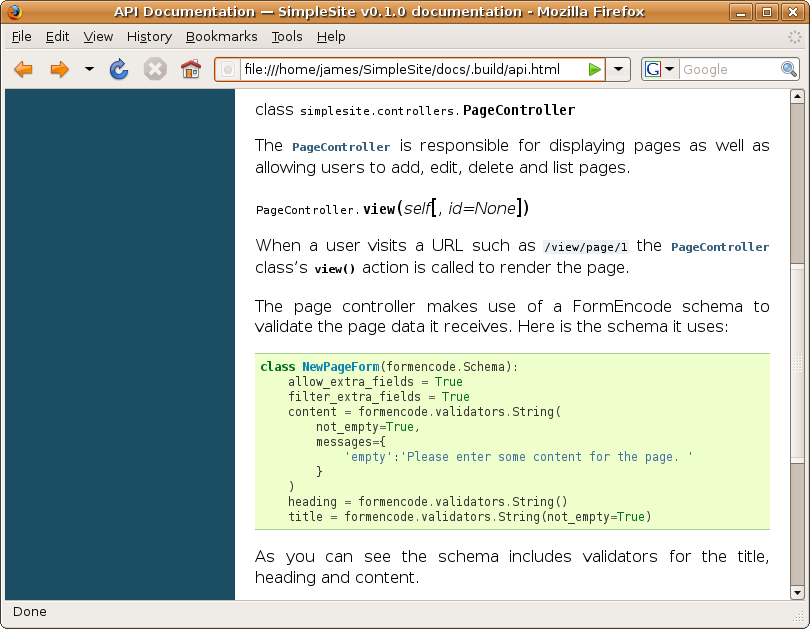
Let’s add some documentation about the FormEnocde schema being used in the page controller as an example. Add this to api.txt just before the heading for the helpers module. The Pygments short name for Python code blocks is python, so this is what you add after the .. code-block:: directive:
The page controller makes use of a FormEncode schema to validate the page
data it receives. Here is the schema it uses:

.. code-block:: python

    class NewPageForm(formencode.Schema):
        allow_extra_fields = True
        filter_extra_fields = True
        content = formencode.validators.String(
            not_empty=True,
            messages={
                'empty': 'Please enter some content for the page.'
            }
        )
        heading = formencode.validators.String()
        title = formencode.validators.String(not_empty=True)

As you can see the schema includes validators for the title, heading
and content.
If you save this and rebuild the documentation, you will see the example syntax nicely highlighted (see Figure 13-5).
Sometimes the code you are demonstrating will contain a mixture of two different types of source code. For example, it might be Mako syntax that also contains HTML or Mako that also contains CSS. In these cases, Pygments provides lexers that you can use via their short names, which are html+mako and html+css, respectively.
As you can see, Sphinx is a powerful and useful tool. It is well worth reading the documentation at http://sphinx.pocco.org to find out exactly what it can do. Two areas that are beyond the scope of this chapter but are nonetheless worth investigating for yourself are Sphinx’s extensive cross-referencing and indexing tools and its ability to generate LaTeX output that can be used to produce high-quality book-style PDF documents.
Summary
In this chapter, you saw every aspect of documenting a Pylons project from using docstrings to learning reStructuredText and building documentation with Sphinx. You’ve even learned how tests can be integrated into documentation.
Documenting a project properly can really help other users of your code. This chapter has given you the knowledge and tools you need to create really good documentation for your Pylons project.
In the next chapter, you’ll return to the SimpleSite tutorial to add a range of new features and learn more about Pylons development as you do.
